GTA IV San Andreas Game (2021) | GTA SA RAGE V3
Download Link: click here to download
Android API 16+
Beginning with Android 8.0 (API 26), there is native support for setting the fonts in XML. However, using the support library extends this down to Android 4.1 (API 16).
1. Add a font to your project
Right click the res folder and go to New > Android Resource Directory. Type font as the name and font as the Resource type.
Copy and paste your font into the new res/font directory. I'm just using a single font in my example, the regular dancing script font. I renamed it to dancing_script.ttf just to avoid any potential naming problems with upper case or illegal characters.

2. Create a font-family XML file.
Right click the res/font folder and choose New > Font Resource File. Call it whatever you want. I'm calling mine my_custom_font.xml.
Paste in the following code. Note that the attributes are set twice, once for android (API 26+) and once for app (API 16+).
<?xml version="1.0" encoding="utf-8"?>
<font-family xmlns:android="http://schemas.android.com/apk/res/android"
xmlns:app="http://schemas.android.com/apk/res-auto">
<font
android:fontStyle="normal"
android:fontWeight="400"
android:font="@font/dancing_script"
app:fontStyle="normal"
app:fontWeight="400"
app:font="@font/dancing_script"
/>
</font-family>
3. Set the font in XML
Now you can just use the fontFamily attribute to set the font in XML.
<TextView
android:layout_width="wrap_content"
android:layout_height="wrap_content"
android:text="Hello World!"
android:fontFamily="@font/my_custom_font" />
Notes
Read the documentation for more help.
If you need to support pre-API 16, then just set the font programmatically.
How to Create Multiple Tabs In a Single Screen Using Android Tab Layout
Being an Android app development company, we encourage our best Android app developers to write and share their knowledge with our audience by writing an Android tutorial. This article is one of them. This article is all about how to create multiple tabs in a single screen using Android Tab Layout.
While using tablayout In Android, there is a new element introduced in Design Support Library. Basically, it provides horizontal layouts to display Android tabs on the screen. Using Android tablayout, we can display more than one screen in a single screen.

What is Android Tab Layout?
Android Tab Layout is basically a view class required to be added into the layout of our app to create sliding tabs.
However, you can create sliding as well as non-sliding tabbed activity by using Android tablayout. If you want to add Android tabs without sliding, then replace the layout with the fragment on tab selected listener event. And, if you want to add sliding tabs, then use ViewPager.
In this Android tablayout example, we’ll see how to add Android tabbed activity with sliding using ViewPager.
Create Java class name “ViewPagerAdapter”
class ViewPagerAdapter extends FragmentPagerAdapter {
private String title[] = {"One", "Two", "Three"};
public ViewPagerAdapter(FragmentManager manager) {
super(manager);
}
@Override
public Fragment getItem(int position) {
return TabFragment.getInstance(position);
}
@Override
public int getCount() {
return title.length;
}
@Override
public CharSequence getPageTitle(int position) {
return title[position];
}
}
TabFragment.java
public class TabFragment extends Fragment {
int position;
private TextView textView;
public static Fragment getInstance(int position) {
Bundle bundle = new Bundle();
bundle.putInt("pos", position);
TabFragment tabFragment = new TabFragment();
tabFragment.setArguments(bundle);
return tabFragment;
}
@Override
public void onCreate(Bundle savedInstanceState) {
super.onCreate(savedInstanceState);
position = getArguments().getInt("pos");
}
@Override
public View onCreateView(LayoutInflater inflater, ViewGroup container,
Bundle savedInstanceState) {
return inflater.inflate(R.layout.fragment_tab, container, false);
}
@Override
public void onViewCreated(View view, @Nullable Bundle savedInstanceState) {
super.onViewCreated(view, savedInstanceState);
textView = (TextView) view.findViewById(R.id.textView);
textView.setText("Fragment " + (position + 1));
}
}
MainActivity
public class MainActivity extends AppCompatActivity {
private Toolbar toolbar;
private TabLayout tabLayout;
private ViewPager viewPager;
@Override
protected void onCreate(Bundle savedInstanceState) {
super.onCreate(savedInstanceState);
setContentView(R.layout.activity_main);
toolbar = (Toolbar) findViewById(R.id.toolbar);
setSupportActionBar(toolbar);
getSupportActionBar().setDisplayHomeAsUpEnabled(true);
viewPager = (ViewPager) findViewById(R.id.viewpager);
ViewPagerAdapter adapter = new ViewPagerAdapter(getSupportFragmentManager());
viewPager.setAdapter(adapter);
tabLayout = (TabLayout) findViewById(R.id.tabs);
tabLayout.setupWithViewPager(viewPager);
}
}
AndroidManifest.xml
<?xml version="1.0" encoding="utf-8"/>
<manifest
xmlns:android="http://schemas.android.com/apk/res/android"
package="com.spaceo.tablayoutdemo">
<application
android:allowBackup="true"
android:icon="@mipmap/ic_launcher"
android:label="@string/app_name"
android:roundIcon="@mipmap/ic_launcher_round"
android:supportsRtl="true"
android:theme="@style/AppTheme">
<activity android:name=".MainActivity">
<intent-filter>
<action android:name="android.intent.action.MAIN"/>
<category android:name="android.intent.category.LAUNCHER"/>
</intent-filter>
</activity>
</application>
</manifest>
build.gradle
apply plugin: 'com.android.application'
android {
compileSdkVersion 25
buildToolsVersion "25.0.2"
defaultConfig {
applicationId "com.spaceo.tablayoutdemo"
minSdkVersion 16
targetSdkVersion 25
versionCode 1
versionName "1.0"
}
buildTypes {
release {
minifyEnabled false
proguardFiles getDefaultProguardFile('proguard-android.txt'), 'proguard-rules.pro'
}
}
}
dependencies {
compile fileTree(dir: 'libs', include: ['*.jar'])
compile 'com.android.support:appcompat-v7:25.2.0'
compile 'com.android.support:design:25.2.0'
}
activity_main.xml
<?xml version="1.0" encoding="utf-8"?>
<android.support.design.widget.CoordinatorLayout
xmlns:android="http://schemas.android.com/apk/res/android"
xmlns:app="http://schemas.android.com/apk/res-auto"
android:layout_width="match_parent"
android:layout_height="match_parent">
<android.support.design.widget.AppBarLayout
android:layout_width="match_parent"
android:layout_height="wrap_content"
android:theme="@style/ThemeOverlay.AppCompat.Dark.ActionBar">
<android.support.v7.widget.Toolbar
android:id="@+id/toolbar"
android:layout_width="match_parent"
android:layout_height="?attr/actionBarSize"
android:background="?attr/colorPrimary"
app:layout_scrollFlags="scroll|enterAlways"
app:popupTheme="@style/ThemeOverlay.AppCompat.Light"/>
<android.support.design.widget.TabLayout
android:id="@+id/tabs"
android:layout_width="match_parent"
android:layout_height="wrap_content"
app:tabGravity="fill"
app:tabMode="fixed"/>
</android.support.design.widget.AppBarLayout>
<android.support.v4.view.ViewPager
android:id="@+id/viewpager"
android:layout_width="match_parent"
android:layout_height="match_parent"
app:layout_behavior="@string/appbar_scrolling_view_behavior"/>
</android.support.design.widget.CoordinatorLayout>
fragment_tab.xml
<?xml version="1.0" encoding="utf-8"?>
<LinearLayout xmlns:android="http://schemas.android.com/apk/res/android"
android:layout_width="match_parent"
android:layout_height="match_parent"
android:orientation="vertical">
<TextView
android:id="@+id/textView"
android:layout_width="match_parent"
android:layout_height="match_parent"
android:gravity="center"
android:padding="10dp"
android:textSize="40sp"
android:textStyle="bold"/>
</LinearLayout>
And done!
This example demonstrate about How to resize Image in Android App.
Step 1 − Create a new project in Android Studio, go to File ⇒ New Project and fill all required details to create a new project.
Step 2 − Add the following code to res/layout/activity_main.xml.
<? xml version= "1.0" encoding= "utf-8" ?>
<RelativeLayout xmlns: android = "http://schemas.android.com/apk/res/android"
xmlns: tools = "http://schemas.android.com/tools"
android :layout_width= "match_parent"
android :layout_height= "match_parent"
android :gravity= "center"
tools :context= ".MainActivity" >
<ImageView
android :id= "@+id/ivImage"
android :layout_width= "wrap_content"
android :layout_height= "wrap_content"
android :layout_centerHorizontal= "true"
android :contentDescription= "@string/app_name"
android :src= "@drawable/ic_launcher_foreground" />
<LinearLayout
android :layout_width= "match_parent"
android :layout_height= "wrap_content"
android :layout_below= "@+id/ivImage"
android :layout_centerHorizontal= "true" >
<Button
android :layout_width= "0dp"
android :layout_height= "wrap_content"
android :layout_marginTop= "8dp"
android :layout_weight= "1"
android :onClick= "uploadImage"
android :text= "Upload Image" />
<Button
android :layout_width= "0dp"
android :layout_height= "wrap_content"
android :layout_marginTop= "8dp"
android :layout_weight= "1"
android :onClick= "resizeImage"
android :text= "Resize Image" />
</LinearLayout>
</RelativeLayout>
Step 3 − Add the following code to src/MainActivity.java
public class MainActivity extends AppCompatActivity {
ImageView ivImage ;
public static final int PICK_IMAGE = 1 ;
Bitmap yourBitmap ;
@Override
protected void onCreate (Bundle savedInstanceState) {
super .onCreate(savedInstanceState) ;
setContentView(R.layout. activity_main ) ;
ivImage = findViewById(R.id. ivImage ) ;
}
public void uploadImage (View view) {
Intent intent = new Intent(Intent. ACTION_GET_CONTENT ) ;
intent.setType( "image/*" ) ;
startActivityForResult(intent , PICK_IMAGE ) ;
}
public void resizeImage (View view) {
Bitmap resized = Bitmap. createScaledBitmap ( yourBitmap , 400 , 400 , true ) ;
ivImage .setImageBitmap(resized) ;
}
@Override
public void onActivityResult ( int requestCode , int resultCode , Intent data) {
super .onActivityResult(requestCode , resultCode , data) ;
if (requestCode == PICK_IMAGE && resultCode == Activity. RESULT_OK ) {
if (data == null ) {
//Display an error
return;
}
try {
Uri imageUri = data.getData() ;
yourBitmap =
MediaStore.Images.Media. getBitmap ( this .getContentResolver() , imageUri) ;
ivImage .setImageBitmap( yourBitmap ) ;
} catch (IOException e) {
e.printStackTrace() ;
}
}
}
}
Step 4 − Add the following code to androidManifest.xml
<? xml version= "1.0" encoding= "utf-8" ?>
<manifest xmlns: android = "http://schemas.android.com/apk/res/android"
package= "app.tutorialspoint.com.sample" >
<application
android :allowBackup= "true"
android :icon= "@mipmap/ic_launcher"
android :label= "@string/app_name"
android :roundIcon= "@mipmap/ic_launcher_round"
android :supportsRtl= "true"
android :theme= "@style/AppTheme" >
<activity android :name= ".MainActivity" >
<intent-filter>
<action android :name= "android.intent.action.MAIN" />
<category android :name= "android.intent.category.LAUNCHER" />
</intent-filter>
</activity>
</application>
</manifest>
This example demonstrates how to do I pass an image from one Activity in android.
Step 1 − Create a new project in Android Studio, go to File ⇒ New Project and fill all required details to create a new project.
Step 2 − Add the following code to res/layout/activity_main.xml.
<?xml version="1.0" encoding="utf-8"?>
<RelativeLayout
xmlns:android="http://schemas.android.com/apk/res/android"
xmlns:tools="http://schemas.android.com/tools"
android:layout_width="match_parent"
android:layout_height="match_parent"
android:padding="16dp"
tools:context=".MainActivity">
<Button
android:id="@+id/btnSend"
android:layout_width="match_parent"
android:layout_height="wrap_content"
android:layout_marginTop="40dp"
android:onClick="SendImage"
android:text="Send Image" />
<ImageView
android:id="@+id/imageView"
android:layout_width="match_parent"
android:layout_height="match_parent"
android:layout_below="@id/btnSend"
android:layout_marginTop="10dp"
android:src="@drawable/image" />
</RelativeLayout>
Step 3 − Add the following code to src/MainActivity.java
public class MainActivity extends AppCompatActivity {
@Override
protected void onCreate(Bundle savedInstanceState) {
super.onCreate(savedInstanceState);
setContentView(R.layout.activity_main);
}
public void SendImage(View view) {
Intent intent = new Intent(MainActivity.this, SecondActivity.class);
intent.putExtra("resId", R.drawable.image);
startActivity(intent);
}
}
Step 4 − Create an empty activity and add the following code:
Activity_second.xml
<?xml version="1.0" encoding="utf-8"?>
<RelativeLayout
xmlns:android="http://schemas.android.com/apk/res/android"
xmlns:tools="http://schemas.android.com/tools"
android:layout_width="match_parent"
android:layout_height="match_parent"
android:padding="8dp"
tools:context=".SecondActivity">
<TextView
android:id="@+id/textView"
android:layout_width="wrap_content"
android:layout_height="wrap_content"
android:layout_centerHorizontal="true"
android:layout_marginTop="40dp"
android:text="Second Activity"
android:textSize="24sp"
android:textStyle="bold"/>
<ImageView
android:layout_width="match_parent"
android:layout_height="match_parent"
android:layout_below="@id/textView"
android:layout_marginTop="5dp"
android:id="@+id/imageView2"/>
</RelativeLayout>
SecondActivity.java
public class SecondActivity extends AppCompatActivity {
ImageView imageView;
@Override
protected void onCreate(Bundle savedInstanceState) {
super.onCreate(savedInstanceState);
setContentView(R.layout.activity_second);
imageView = findViewById(R.id.imageView2);
Bundle bundle = getIntent().getExtras();
if (bundle != null) {
int resId = bundle.getInt("resId");
imageView.setImageResource(resId);
}
}
}
Step 5 − Add the following code to androidManifest.xml
<?xml version="1.0" encoding="utf-8"?>
<manifest xmlns:android="http://schemas.android.com/apk/res/android" package="app.com.sample">
<application
android:allowBackup="true"
android:icon="@mipmap/ic_launcher"
android:label="@string/app_name"
android:roundIcon="@mipmap/ic_launcher_round"
android:supportsRtl="true"
android:theme="@style/AppTheme">
<activity android:name=".SecondActivity"></activity>
<activity android:name=".MainActivity">
<intent-filter>
<action android:name="android.intent.action.MAIN" />
<category android:name="android.intent.category.LAUNCHER" />
</intent-filter>
</activity>
</application>
</manifest>
Let's try to run your application. I assume you have connected your actual How to code android device with your computer. To run the app from the android studio, open one of your project's activity files and click Run icon from the toolbar. Select your mobile device as an option and then check your mobile device which will display your default screen

This example demonstrates how do I does one Glide to download an image into a bitmap.
Step 1 − Create a new project in Android Studio, go to File ⇒ New Project and fill all required details to create a new project
Add the following dependency in build.gradle: Module: app
implementation 'com.github.bumptech.glide:glide:4.9.0'
Step 2 − Add the following code to res/layout/activity_main.xml.
<?xml version="1.0" encoding="utf-8"?>
<RelativeLayout xmlns:android="http://schemas.android.com/apk/res/android"
xmlns:tools="http://schemas.android.com/tools"
android:layout_width="match_parent"
android:layout_height="match_parent"
tools:context=".MainActivity">
<ImageView
android:id="@+id/imageView"
android:layout_width="match_parent"
android:layout_height="match_parent" />
</RelativeLayout>
Step 3 − Add the following code to src/MainActivity.java
public class MainActivity extends AppCompatActivity {
ImageView imageView;
@Override
protected void onCreate(Bundle savedInstanceState) {
super.onCreate(savedInstanceState);
setContentView(R.layout.activity_main);
imageView = findViewById(R.id.imageView);
Glide.with(this).asBitmap().load("https://www.google.es/images/srpr/logo11w.png").into(new CustomTarget<Bitmap>() {
@Override
public void onResourceReady(@NonNull Bitmap resource, @Nullable Transition<? super Bitmap> transition) {
imageView.setImageBitmap(resource);
}
@Override
public void onLoadCleared(@Nullable Drawable placeholder) {
}
});
}
}
Step 4 − Add the following code to androidManifest.xml
<?xml version="1.0" encoding="utf-8"?>
<manifest xmlns:android="http://schemas.android.com/apk/res/android" package="app.com.sample">
<uses-permission android:name="android.permission.INTERNET"/>
<application
android:allowBackup="true"
android:icon="@mipmap/ic_launcher"
android:label="@string/app_name"
android:roundIcon="@mipmap/ic_launcher_round"
android:supportsRtl="true"
android:theme="@style/AppTheme">
<activity android:name=".MainActivity">
<intent-filter>
<action android:name="android.intent.action.MAIN" />
<category android:name="android.intent.category.LAUNCHER" />
</intent-filter>
</activity>
</application>
</manifest>
Let's try to run your application. I assume you have connected your actual Android Mobile device with your computer. To run the app from the android studio, open one of your project's activity files and click Run icon from the toolbar. Select your mobile device as an option and then check your mobile device which will display your default screen

This example demonstrates how do I use the Android Picasso library to download images.
Step 1 − Create a new project in Android Studio, go to File ⇒New Project and fill all required details to create a new project.
Add the following dependency to the build gradle (Module: app)
implementation 'com.squareup.picasso:picasso:2.4.0'
Step 2 − Add the following code to res/layout/activity_main.xml.
<?xml version="1.0" encoding="utf-8"?>
<RelativeLayout xmlns:android="http://schemas.android.com/apk/res/android"
xmlns:tools="http://schemas.android.com/tools"
android:layout_width="match_parent"
android:layout_height="match_parent"
android:padding="4dp"
tools:context=".MainActivity">
<ImageView
android:id="@+id/imageView"
android:layout_width="match_parent"
android:layout_height="match_parent"
android:layout_above="@id/btnDownload"/>
<Button
android:id="@+id/btnDownload"
android:layout_width="match_parent"
android:layout_height="wrap_content"
android:textAlignment="center"
android:layout_alignParentBottom="true"
android:text="Download Image"/>
</RelativeLayout>
Step 3 − Add the following code to src/MainActivity.java
public class MainActivity extends AppCompatActivity {
ImageView imageView;
Button btnDownload;
@Override
protected void onCreate(Bundle savedInstanceState) {
super.onCreate(savedInstanceState);
setContentView(R.layout.activity_main);
imageView = findViewById(R.id.imageView);
btnDownload = findViewById(R.id.btnDownload);
btnDownload.setOnClickListener(new View.OnClickListener() {
@Override
public void onClick(View v) {
Picasso.with(MainActivity.this)
.load("https://images.pexels.com/photos/1212487/pexels-photo1212487.jpeg?auto=compress&cs=tinysrgb&dpr=2&h=750&w=1260")
.into(imageView);
}
});
}
}
Step 4 − Add the following code to androidManifest.xml
<?xml version="1.0" encoding="utf-8"?>
<manifest xmlns:android="http://schemas.android.com/apk/res/android" package="app.com.sample">
<uses-permission android:name="android.permission.INTERNET"/>
<application
android:allowBackup="true"
android:icon="@mipmap/ic_launcher"
android:label="@string/app_name"
android:roundIcon="@mipmap/ic_launcher_round"
android:supportsRtl="true"
android:theme="@style/AppTheme">
<activity android:name=".MainActivity">
<intent-filter>
<action android:name="android.intent.action.MAIN" />
<category android:name="android.intent.category.LAUNCHER" />
</intent-filter>
</activity>
</application>
</manifest>
Let's try to run your application. I assume you have connected your actual Android code example device with your computer. To run the app from the android studio, open one of your project's activity files and click Run icon from the toolbar. Select your mobile device as an option and then check your mobile device which will display your default screen

This example demonstrates how to pick an image from an image gallery on Android using Kotlin.
Step 1 − Create a new project in Android Studio, go to File ⇒ New Project and fill all required details to create a new project.
Step 2 − Add the following code to res/layout/activity_main.xml.
<?xml version="1.0" encoding="utf-8"?>
<LinearLayout xmlns:android="http://schemas.android.com/apk/res/android"
android:layout_width="fill_parent"
android:layout_height="fill_parent"
android:orientation="vertical"
android:padding="2dp">
<ImageView
android:id="@+id/imageView"
android:layout_width="match_parent"
android:layout_height="wrap_content"
android:layout_weight="1" />
<Button
android:id="@+id/buttonLoadPicture"
android:layout_width="wrap_content"
android:layout_height="wrap_content"
android:layout_gravity="center"
android:layout_weight="0"
android:text="Load Picture" />
</LinearLayout>
Step 3 − Add the following code to src/MainActivity.kt
class MainActivity : AppCompatActivity() {
lateinit var imageView: ImageView
lateinit var button: Button
private val pickImage = 100
private var imageUri: Uri? = null
override fun onCreate(savedInstanceState: Bundle?) {
super.onCreate(savedInstanceState)
setContentView(R.layout.activity_main)
title = "KotlinApp"
imageView = findViewById(R.id.imageView)
button = findViewById(R.id.buttonLoadPicture)
button.setOnClickListener {
val gallery = Intent(Intent.ACTION_PICK, MediaStore.Images.Media.INTERNAL_CONTENT_URI)
startActivityForResult(gallery, pickImage)
}
}
override fun onActivityResult(requestCode: Int, resultCode: Int, data: Intent?) {
super.onActivityResult(requestCode, resultCode, data)
if (resultCode == RESULT_OK && requestCode == pickImage) {
imageUri = data?.data
imageView.setImageURI(imageUri)
}
}
}
Step 4 − Add the following code to androidManifest.xml
<?xml version="1.0" encoding="utf-8"?>
<manifest xmlns:android="http://schemas.android.com/apk/res/android" package="com.example.q11">
<uses-permission android:name="android.permission.READ_EXTERNAL_STORAGE"/>
<application
android:allowBackup="true"
android:icon="@mipmap/ic_launcher"
android:label="@string/app_name"
android:roundIcon="@mipmap/ic_launcher_round"
android:supportsRtl="true"
android:theme="@style/AppTheme">
<activity android:name=".MainActivity">
<intent-filter>
<action android:name="android.intent.action.MAIN" />
<category android:name="android.intent.category.LAUNCHER" />
</intent-filter>
</activity>
</application>
</manifest>
Let's try to run your application. I assume you have connected your actual kotlin example device with your computer. To run the app from android studio, open one of your project's activity files and click the Run iconPlay from the toolbar. Select your mobile device as an option and then check your mobile device which will display your default screen.

This example demonstrates how do I get a bitmap from Url in android app.
Step 1 − Create a new project in Android Studio, go to File ⇒ New Project and fill all required details to create a new project.
Step 2 − Add the following code to res/layout/activity_main.xml.
<?xml version="1.0" encoding="utf-8"?>
<LinearLayout xmlns:android="http://schemas.android.com/apk/res/android"
xmlns:tools="http://schemas.android.com/tools"
android:layout_width="match_parent"
android:layout_height="match_parent"
android:padding="8dp"
android:orientation="vertical"
tools:context=".MainActivity">
<LinearLayout
android:layout_width="wrap_content"
android:layout_height="wrap_content"
android:orientation="vertical"
android:layout_gravity="center">
<ImageView
android:layout_width="150dp"
android:layout_height="150dp"
android:layout_gravity="center"
android:layout_margin="15dp"
android:src="@drawable/image"/>
</LinearLayout>
<ImageView
android:id="@+id/iMageView"
android:layout_width="match_parent"
android:layout_height="match_parent"
android:layout_gravity="center"
android:layout_margin="20sp"/>
</LinearLayout>
Step 3 – Copy and paste an image (.png/.jpg/.jpeg) into res/drawable
Step 4 − Add the following code to src/MainActivity.java
public class MainActivity extends AppCompatActivity {
Bitmap bitmap;
ImageView image;
String urlImage = "https://thumbs.dreamstime.com/z/hands-holding-blue-earth-cloud-sky" + "-elements-imag-background-image-furnished-nasa-61052787.jpg";
@Override
protected void onCreate(Bundle savedInstanceState) {
super.onCreate(savedInstanceState);
setContentView(R.layout.activity_main);
image = findViewById(R.id.iMageView);
new GetImageFromUrl(image).execute(urlImage);
}
public class GetImageFromUrl extends AsyncTask<String, Void, Bitmap>{
ImageView imageView;
public GetImageFromUrl(ImageView img){
this.imageView = img;
}
@Override
protected Bitmap doInBackground(String... url) {
String stringUrl = url[0];
bitmap = null;
InputStream inputStream;
try {
inputStream = new java.net.URL(stringUrl).openStream();
bitmap = BitmapFactory.decodeStream(inputStream);
} catch (IOException e) {
e.printStackTrace();
}
return bitmap;
}
@Override
protected void onPostExecute(Bitmap bitmap){
super.onPostExecute(bitmap);
imageView.setImageBitmap(bitmap);
}
}
}
Step 5 - Add the following code to androidManifest.xml
<?xml version="1.0" encoding="utf-8"?>
<manifest xmlns:android="http://schemas.android.com/apk/res/android" package="app.com.sample">
<uses-permission android:name="android.permission.INTERNET"/>
<application
android:allowBackup="true"
android:icon="@mipmap/ic_launcher"
android:label="@string/app_name"
android:roundIcon="@mipmap/ic_launcher_round"
android:supportsRtl="true"
android:theme="@style/AppTheme">
<activity android:name=".MainActivity">
<intent-filter>
<action android:name="android.intent.action.MAIN" />
<category android:name="android.intent.category.LAUNCHER" />
</intent-filter>
</activity>
</application>
</manifest>
Let's try to run your application. I assume you have connected your actual Android Mobile device with your computer. To run the app from android studio, open one of your project's activity files and click Run Play Icon icon from the toolbar. Select your mobile device as an option and then check your mobile device which will display your default screen

This example demonstrates how do I pick an image from image gallery in android app
Step 1 − Create a new project in Android Studio, go to File ⇒ New Project and fill all required details to create a new project.
Step 2 − Add the following code to res/layout/activity_main.xml
<?xml version="1.0" encoding="utf-8"?>
<LinearLayout
xmlns:android="http://schemas.android.com/apk/res/android"
android:orientation="vertical"
android:layout_width="fill_parent"
android:layout_height="fill_parent">
<ImageView
android:id="@+id/imageView"
android:layout_width="fill_parent"
android:layout_height="wrap_content"
android:layout_weight="1"/>
<Button
android:id="@+id/buttonLoadPicture"
android:layout_width="wrap_content"
android:layout_height="wrap_content"
android:layout_weight="0"
android:text="Load Picture"
android:layout_gravity="center"/>
</LinearLayout>
Step 3 − Add the following code to src/MainActivity.java
public class MainActivity extends Activity {
ImageView imageView;
Button button;
private static final int PICK_IMAGE = 100;
Uri imageUri;
@Override
public void onCreate(Bundle savedInstanceState) {
super.onCreate(savedInstanceState);
setContentView(R.layout.activity_main);
imageView = (ImageView)findViewById(R.id.imageView);
button = (Button)findViewById(R.id.buttonLoadPicture);
button.setOnClickListener(new View.OnClickListener() {
@Override
public void onClick(View v) {
openGallery();
}
});
}
private void openGallery() {
Intent gallery = new Intent(Intent.ACTION_PICK, MediaStore.Images.Media.INTERNAL_CONTENT_URI);
startActivityForResult(gallery, PICK_IMAGE);
}
@Override
protected void onActivityResult(int requestCode, int resultCode, Intent data){
super.onActivityResult(requestCode, resultCode, data);
if (resultCode == RESULT_OK && requestCode == PICK_IMAGE){
imageUri = data.getData();
imageView.setImageURI(imageUri);
}
}
}
Step 4 − Add the following code to androidManifest.xm
<?xml version="1.0" encoding="utf-8"?>
<manifest xmlns:android="http://schemas.android.com/apk/res/android" package="app.com.sample">
<uses-permission android:name="android.permission.READ_EXTERNAL_STORAGE"/>
<application
android:allowBackup="true"
android:icon="@mipmap/ic_launcher"
android:label="@string/app_name"
android:roundIcon="@mipmap/ic_launcher_round"
android:supportsRtl="true"
android:theme="@style/AppTheme">
<activity android:name=".MainActivity">
<intent-filter>
<action android:name="android.intent.action.MAIN" />
<category android:name="android.intent.category.LAUNCHER" />
</intent-filter>
</activity>
</application>
</manifest>
Let's try to run your application. I assume you have connected your actual Android Mobile device with your computer. To run the app from android example studio, open one of your project's activity files and click Run icon from the toolbar. Select your mobile device as an option and then check your mobile device which will display your default screen

This example demonstrates how do I download and save an image from a given URL in android.
Step 1 − Create a new project in Android Studio, go to File ⇒ New Project and fill all required details to create a new project.
Step 2 − Add the following code to res/layout/activity_main.xml.
<?xml version="1.0" encoding="utf-8"?>
<android.support.design.widget.CoordinatorLayout
xmlns:android="http://schemas.android.com/apk/res/android"
xmlns:app="http://schemas.android.com/apk/res-auto"
android:id="@+id/coordinatorLayout"
android:layout_width="match_parent"
android:layout_height="match_parent">
<Button
android:id="@+id/btnDownload"
android:layout_width="wrap_content"
android:layout_height="wrap_content"
android:text="Download Image"
android:layout_margin="25dp"
android:layout_gravity="top|center_horizontal" />
<ImageView
android:id="@+id/imageView"
android:layout_width="match_parent"
android:layout_height="200dp"
android:scaleType="centerCrop"
app:layout_anchor="@id/btnDownload"
android:layout_gravity="bottom"
app:layout_anchorGravity="bottom"
android:layout_margin="10dp" />
</android.support.design.widget.CoordinatorLayout>
Step 3 − Add the following code to src/MainActivity.java
public class MainActivity extends AppCompatActivity {
Context context;
Activity activity;
CoordinatorLayout coordinatorLayout;
Button button;
ProgressDialog mProgressDialog;
ImageView mImageView;
URL url;
AsyncTask mMyTask;
@Override
protected void onCreate(Bundle savedInstanceState) {
super.onCreate(savedInstanceState);
setContentView(R.layout.activity_main);
context = getApplicationContext();
activity = MainActivity.this;
coordinatorLayout = findViewById(R.id.coordinatorLayout);
button = findViewById(R.id.btnDownload);
mImageView = findViewById(R.id.imageView);
mProgressDialog = new ProgressDialog(activity);
mProgressDialog.setIndeterminate(true);
mProgressDialog.setProgressStyle(ProgressDialog.STYLE_SPINNER);
mProgressDialog.setTitle("AsyncTask");
mProgressDialog.setMessage("Please wait, we are downloading your image file...");
button.setOnClickListener(new View.OnClickListener() {
@Override
public void onClick(View view) {
mMyTask = new DownloadTask().execute(stringToURL());
}
});
}
private class DownloadTask extends AsyncTask<URL,Void,Bitmap>{
protected void onPreExecute(){
mProgressDialog.show();
}
protected Bitmap doInBackground(URL...urls){
URL url = urls[0];
HttpURLConnection connection = null;
try{
connection = (HttpURLConnection) url.openConnection();
connection.connect();
InputStream inputStream = connection.getInputStream();
BufferedInputStream bufferedInputStream = new BufferedInputStream(inputStream);
return BitmapFactory.decodeStream(bufferedInputStream);
}catch(IOException e){
e.printStackTrace();
}
return null;
}
// When all async task done
protected void onPostExecute(Bitmap result){
// Hide the progress dialog
mProgressDialog.dismiss();
if(result!=null){
mImageView.setImageBitmap(result);
} else {
// Notify user that an error occurred while downloading image
Toast.makeText(MainActivity.this, "Error", Toast.LENGTH_SHORT).show();
}
}
}
protected URL stringToURL() {
try {
url = new URL("https://wallpapersite.com/images/pages/pic_w/6408.jpg");
return url;
} catch (MalformedURLException e) {
e.printStackTrace();
}
return null;
}
}
Step 4 − Add the following code to androidManifest.xml
<?xml version="1.0" encoding="utf-8"?>
<manifest xmlns:android="http://schemas.android.com/apk/res/android" package="app.com.sample">
<uses-permission android:name="android.permission.WRITE_EXTERNAL_STORAGE"/>
<uses-permission android:name="android.permission.INTERNET"/>
<application
android:allowBackup="true"
android:icon="@mipmap/ic_launcher"
android:label="@string/app_name"
android:roundIcon="@mipmap/ic_launcher_round"
android:supportsRtl="true"
android:theme="@style/AppTheme">
<activity android:name=".MainActivity">
<intent-filter>
<action android:name="android.intent.action.MAIN" />
<category android:name="android.intent.category.LAUNCHER" />
</intent-filter>
</activity>
</application>
</manifest>
Let's try to run your application. I assume you have connected your actual Android example device with your computer. To run the app from android studio, open one of your project's activity files and click Run Play Icon icon from the toolbar. Select your mobile device as an option and then check your mobile device which will display your default screen

This example demonstrates how do I download image from url in android.
Step 1 − Create a new project in Android Studio, go to File ⇒ New Project and fill all required details to create a new project.
Step 2 − Add the following code to res/layout/activity_main.xml.
<RelativeLayout xmlns:android="http://schemas.android.com/apk/res/android"
android:layout_width="match_parent"
android:layout_height="match_parent" >
<ImageView
android:id="@+id/image"
android:layout_width="wrap_content"
android:layout_height="wrap_content"
android:layout_centerHorizontal="true"
android:layout_centerVertical="true">
</ImageView>
<Button
android:id="@+id/button"
android:layout_width="fill_parent"
android:layout_height="wrap_content"
android:layout_below="@+id/image"
android:layout_centerHorizontal="true"
android:layout_centerVertical="true"
android:text="@string/button" />
</RelativeLayout>
Step 3 − Add the following code to src/MainActivity.java
public class MainActivity extends AppCompatActivity {
String url = "https://images.pexels.com/photos/1226302/pexels-photo1226302.jpeg?auto=compress&cs=tinysrgb&dpr=1&w=500";
ImageView image;
Button button;
ProgressDialog mProgressDialog;
@Override
public void onCreate(Bundle savedInstanceState) {
super.onCreate(savedInstanceState);
setContentView(R.layout.activity_main);
image = (ImageView) findViewById(R.id.image);
button = findViewById(R.id.button);
button.setOnClickListener(new View.OnClickListener() {
@Override
public void onClick(View v) {
new DownloadImage().execute(url);
}
});
}
private class DownloadImage extends AsyncTask {
@Override
protected void onPreExecute() {
super.onPreExecute();
mProgressDialog = new ProgressDialog(MainActivity.this);
mProgressDialog.setTitle("Download Image Tutorial");
mProgressDialog.setMessage("Loading...");
mProgressDialog.setIndeterminate(false);
mProgressDialog.show();
}
@Override
protected Bitmap doInBackground(String... URL) {
String imageURL = URL[0];
Bitmap bitmap = null;
try {
// Download Image from URL
InputStream input = new java.net.URL(imageURL).openStream();
// Decode Bitmap
bitmap = BitmapFactory.decodeStream(input);
} catch (Exception e) {
e.printStackTrace();
}
return bitmap;
}
@Override
protected void onPostExecute(Bitmap result) {
// Set the bitmap into ImageView
image.setImageBitmap(result);
// Close progressdialog
mProgressDialog.dismiss();
}
}
}
Step 4 − Open resources -> string.xml and add the following code −
<resources>
<string name="app_name">Sample</string>
<string name="menu_settings">Settings</string>
<string name="button">Download Image</string>
</resources>
Step 5 − Add the following code to androidManifest.xml
<?xml version="1.0" encoding="utf-8"?>
<manifest xmlns:android="http://schemas.android.com/apk/res/android" package="app.com.sample">
<uses-permission android:name="android.permission.INTERNET" ></uses-permission>
<application
android:allowBackup="true"
android:icon="@mipmap/ic_launcher"
android:label="@string/app_name"
android:roundIcon="@mipmap/ic_launcher_round"
android:supportsRtl="true"
android:theme="@style/AppTheme">
<activity android:name=".MainActivity">
<intent-filter>
<action android:name="android.intent.action.MAIN" />
<category android:name="android.intent.category.LAUNCHER" />
</intent-filter>
</activity>
</application>
</manifest>
Let's try to run your application. I assume you have connected your actual Android Mobile device with your computer. To run the app from android studio, open one of your project's activity files and click Run icon from the toolbar. Select your mobile device as an option and then check your mobile device which will display your default screen

Hello guys, If you are looking to get GTA 5 highly compressed on pc so you are at the right place.
How To Download files from this website? just click here.

Grand Theft Auto V is an action-adventure video game developed by Rockstar North and published by Rockstar Games. It was released in April 2015 for Microsoft Windows.
Minimum System Requirements:
OS: Windows 10 64 Bit, Windows 8.1 64 Bit, Windows 8 64 Bit, Windows 7 64 Bit Service Pack 1
Processor: Intel Core 2 Duo / AMD Phenom Quad-Core Processor (4 CPUs) @ 2.5GHz
Memory: 4GB
Video Card: 1GB of Dedicated Video Memory - click here to check it
Sound Card: 100% DirectX10
HDD Space: 78GB
Download Link

→ Before playing any game always install 3 important softwares.
DOWNLOAD 3 IMPORTANT SOFTWARE'S
About DirectX: This version of DirectX is a universal version. it will automatically install DirectX according to your computer graphics. This version is called DirectX10 Offline and it is perfect it will also automatically install DirectX9, DirectX10, DirectX11, DirectX12 e.t.c.
About Visual C++: This version is a complete version of VBC. and it is offline you can easily install this.
About .Net Framework: Please note some times .Net Framework is already installed in windows make sure it is up to date. I sheared the latest version you can download and install.
Please note that 32-bit x86 machines are not good for heavy games. Most of the recent games require up to 8GB recommended RAM. Therefore please always install the x64 version of Windows. We recommend 8GB RAM and Windows 7 x64 for a good experience.
Happy gaming and if you like my work then please support me by sharing this blog's link to your friends or someone else.
Check out more games:
GTA IV Download: click here
GTA 5 4GB Ram Lag Fix: click here
GTA 5 Texture missing FIX: click here
Play GTA 5 Epic Games in Offline mode without internet: click here
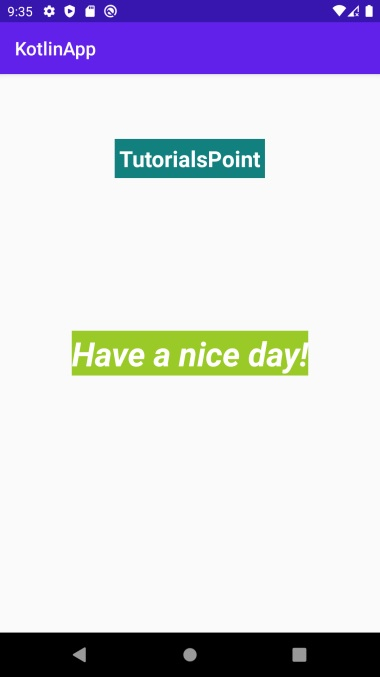
This example demonstrates how to change a TextView's style at runtime in Android using Kotlin.
Step 1 − Create a new project in Android Studio, go to File ⇒ New Project and fill all required details to create a new project.
Step 2 − Add the following code to res/layout/activity_main.xml.
<?xml version="1.0" encoding="utf-8"?>
<RelativeLayout xmlns:android="http://schemas.android.com/apk/res/android"
xmlns:tools="http://schemas.android.com/tools"
android:layout_width="match_parent"
android:layout_height="match_parent"
tools:context=".MainActivity">
<TextView
android:layout_width="wrap_content"
android:layout_height="wrap_content"
android:layout_centerHorizontal="true"
android:layout_marginTop="70dp"
android:background="#008080"
android:padding="5dp"
android:text="TutorialsPoint"
android:textColor="#fff"
android:textSize="24sp"
android:textStyle="bold" />
<TextView
android:id="@+id/textView"
android:layout_width="wrap_content"
android:layout_height="wrap_content"
android:layout_centerInParent="true"
android:text="Have a nice day!"
android:textColor="@android:color/background_dark"
android:textSize="36sp"
android:textStyle="bold" />
</RelativeLayout>
Step 3 − Add the following code in res/values/styles.xml
<resources>
<style name="boldText">
<item name="android:textStyle">bold|italic</item>
<item name="android:textColor">#FFFFFF</item>
</style>
<style name="normalText">
<item name="android:textStyle">normal</item>
<item name="android:textColor">#C0C0C0</item>
</style>
</resources>
Step 4 − Add the following code in res/values/colors.xml
<resources>
<color name="highlightedTextViewColor">@android:color/holo_green_light</color>
<color name="normalTextViewColor">@android:color/holo_red_dark</color>
</resources>
Step 5 − Add the following code to src/MainActivity.kt
import android.os.Build
import android.os.Bundle
import android.widget.TextView
import androidx.appcompat.app.AppCompatActivity
class MainActivity : AppCompatActivity() {
lateinit var textView: TextView
override fun onCreate(savedInstanceState: Bundle?) {
super.onCreate(savedInstanceState)
setContentView(R.layout.activity_main)
title = "KotlinApp"
textView = findViewById(R.id.textView)
textView.setOnClickListener {
if (Build.VERSION.SDK_INT < 23) {
textView.setTextAppearance(applicationContext, R.style.boldText)
}
else {
textView.setTextAppearance(R.style.boldText)
}
textView.setBackgroundResource(R.color.highlightedTextViewColor)
}
}
}
Step 6 − Add the following code to androidManifest.xml
<?xml version="1.0" encoding="utf-8"?>
<manifest xmlns:android="http://schemas.android.com/apk/res/android"
package="com.example.q11">
<application
android:allowBackup="true"
android:icon="@mipmap/ic_launcher"
android:label="@string/app_name"
android:roundIcon="@mipmap/ic_launcher_round"
android:supportsRtl="true"
android:theme="@style/AppTheme">
<activity android:name=".MainActivity">
<intent-filter>
<action android:name="android.intent.action.MAIN" />
<category android:name="android.intent.category.LAUNCHER" />
</intent-filter>
</activity>
</application>
</manifest>
Let's try to run your application. I assume you have connected your actual Android Mobile device with your computer. To run the app from android studio, open one of your project's activity files and click the Run icon Play from the toolbar. Select your mobile device as an option and then check your mobile device which will display your default screen.
How To Download files from this website? just click here.


WE GET ONLY TWO MAPS IN THIS GAME
1. TRAINYEARD
2. AFGHAN AIRBASE
TRAINYEARD IS SAME MAP FROM IGI 1.
Multiplayer
No we can’t play multiplayer with our friends but soon developer a working on multiplayer mode we will get soon a new update on this came.
Features

The game graphics are too awesome You will get the 4K texture quality graphics and motion blur graphics.
The zipped file size of Project IGI full game setup is around 500 MB. In order to run this game smoothly, your PC should have about 2GB of free.
Tutorial Video to Download+Install:
Download Links
How To Download files from this website? just click here.

Spinner in Android is a widget that is used to select an item from a list of items. When the user tap on a spinner a drop-down menu is visible to the user. In this article, we will learn how to add custom spinner in the app. If you want to know more about spinner in detail then click on this link.

Create a new file algorithm_spinner.xml and add the following code. Each item in spinner will have this layout, an image view and a textview.
algorithm_spinner.xml
<?xml version="1.0" encoding="utf-8"?>
<RelativeLayout
xmlns:android="http://schemas.android.com/apk/res/android"
android:layout_width="match_parent"
android:layout_height="match_parent">
<ImageView
android:id="@+id/image_view"
android:layout_width="100dp"
android:layout_height="100dp"
android:src="@drawable/gfg" />
<TextView
android:id="@+id/text_view"
android:layout_width="wrap_content"
android:layout_height="wrap_content"
android:layout_alignBottom="@+id/image_view"
android:layout_alignParentTop="true"
android:layout_margin="20dp"
android:layout_toEndOf="@+id/image_view"
android:gravity="center"
android:text="Quick Sort"
android:textColor="@android:color/black"
android:textSize="20sp" />
</RelativeLayout>
Create a new file AlgorithmItem.java and add the below following code. This is the model class which is used to get the algorithm name when the user clicks on any item. Here we define a constructor and a getAlgorithmName method which returns the algorithm name of the object.
AlgorithmItem.java
public class AlgorithmItem {
private String algorithmName;
public AlgorithmItem(String countryName)
{
algorithmName = countryName;
}
public String getAlgorithmName()
{
return algorithmName;
}
}
Create a new file AlgorithmAdapter.java and add the following code. Here we define our own Adapter class. It maps the item with its view, providing access to the item`s data in the list of spinner.
public class AlgorithmAdapter extends ArrayAdapter<AlgorithmItem> {
public AlgorithmAdapter(Context context,
ArrayList<AlgorithmItem> algorithmList)
{
super(context, 0, algorithmList);
}
@NonNull
@Override
public View getView(int position, @Nullable
View convertView, @NonNull ViewGroup parent)
{
return initView(position, convertView, parent);
}
@Override
public View getDropDownView(int position, @Nullable
View convertView, @NonNull ViewGroup parent)
{
return initView(position, convertView, parent);
}
private View initView(int position, View convertView,
ViewGroup parent)
{
// It is used to set our custom view.
if (convertView == null) {
convertView = LayoutInflater.from(getContext()).inflate(R.layout.algorithm_spinner, parent, false);
}
TextView textViewName = convertView.findViewById(R.id.text_view);
AlgorithmItem currentItem = getItem(position);
// It is used the name to the TextView when the
// current item is not null.
if (currentItem != null) {
textViewName.setText(currentItem.getAlgorithmName());
}
return convertView;
}
}
Add the following code in activity_main.xml file. Here we add our spinner on the layout. This will add a textview and a spinner.
activity_main.xml
<?xml version="1.0" encoding="utf-8"?>
<RelativeLayout
xmlns:android="http://schemas.android.com/apk/res/android"
xmlns:tools="http://schemas.android.com/tools"
android:layout_width="match_parent"
android:layout_height="match_parent"
tools:context=".MainActivity">
<TextView
android:layout_width="match_parent"
android:layout_height="wrap_content"
android:text="Learn Algorithms"
android:textStyle="bold"
android:textSize="18sp"
android:layout_above="@+id/spinner_algorithm"
android:layout_marginStart="10dp"
android:layout_marginBottom="25dp"
/>
<Spinner
android:layout_margin="5dp"
android:id="@+id/spinner_algorithm"
android:layout_width="wrap_content"
android:layout_height="wrap_content"
android:layout_centerInParent="true"
android:layout_marginTop="18dp" />
</RelativeLayout>
Now add the following code in the MainActivity.java file. Here AlgorithmAdapter class object is made and it acts as an adapter for the spinner and add onItemSelectedListner() to our spinner. When the user tap on any item of the spinner, it gets invoked. It shows a toast with the name of the item that user selected from the list.
MainActivity.java
public class MainActivity extends AppCompatActivity {
ArrayList<AlgorithmItem> algorithmItems;
AlgorithmAdapter adapter;
@Override
protected void onCreate(Bundle savedInstanceState)
{
super.onCreate(savedInstanceState);
setContentView(R.layout.activity_main);
initList();
Spinner spinner = findViewById(R.id.spinner_algorithm);
// we pass our item list and context to our Adapter.
adapter = new AlgorithmAdapter(this, algorithmItems);
spinner.setAdapter(adapter);
spinner.setOnItemSelectedListener(
new AdapterView.OnItemSelectedListener() {
@Override
public void onItemSelected(AdapterView<?> parent,
View view, int position, long id)
{
// It returns the clicked item.
AlgorithmItem clickedItem = (AlgorithmItem)
parent.getItemAtPosition(position);
String name = clickedItem.getAlgorithmName();
Toast.makeText(MainActivity.this, name + " selected", Toast.LENGTH_SHORT).show();
}
@Override
public void onNothingSelected(AdapterView<?> parent)
{
}
});
}
// It is used to set the algorithm names to our array list.
private void initList()
{
algorithmItems = new ArrayList<>();
algorithmItems.add(new AlgorithmItem("Quick Sort"));
algorithmItems.add(new AlgorithmItem("Merge Sort"));
algorithmItems.add(new AlgorithmItem("Heap Sort"));
algorithmItems.add(new AlgorithmItem("Prims Algorithm"));
algorithmItems.add(new AlgorithmItem("Kruskal Algorithm"));
algorithmItems.add(new AlgorithmItem("Rabin Karp"));
algorithmItems.add(new AlgorithmItem("Binary Search"));
}
}